
Here at Vecteezy, we offer millions of vectors that can be downloaded and incorporated into your own work. The tips covered in this article will help you to master some of the common tasks new users may face when downloading and working with stock vector files in both Illustrator and Inkscape.
Related: What is a Vector File?
1. Checking for Locked Layers
Depending on how an author creates an image, certain elements may be in their own layers and locked, and therefore uneditable. But there’s an easy fix. In Illustrator, go to Window > Layers.
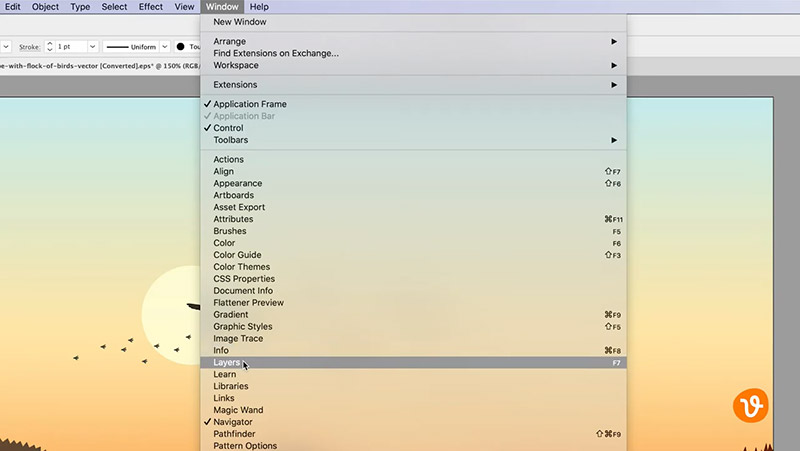
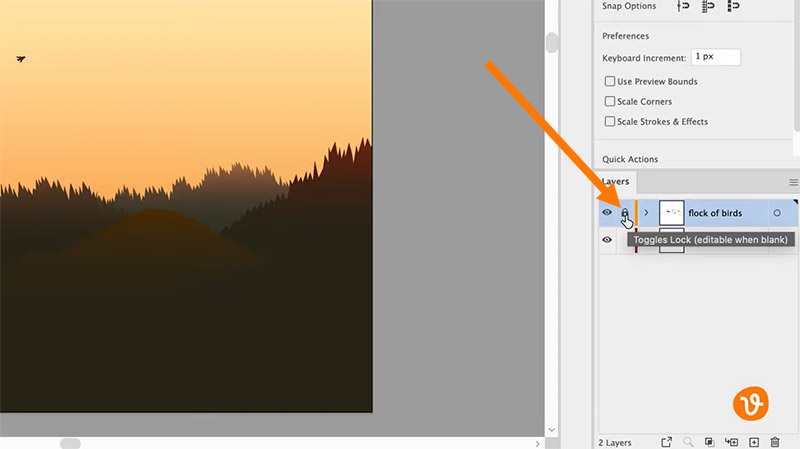
Look for any locked layers (indicated by the lock icon), or look at the thumbnails to find the specific elements and corresponding layers you want to unlock. Then click the lock icon next to each one that you want to unlock.
In Inkscape, go to the Layer menu and open the Layers palette.
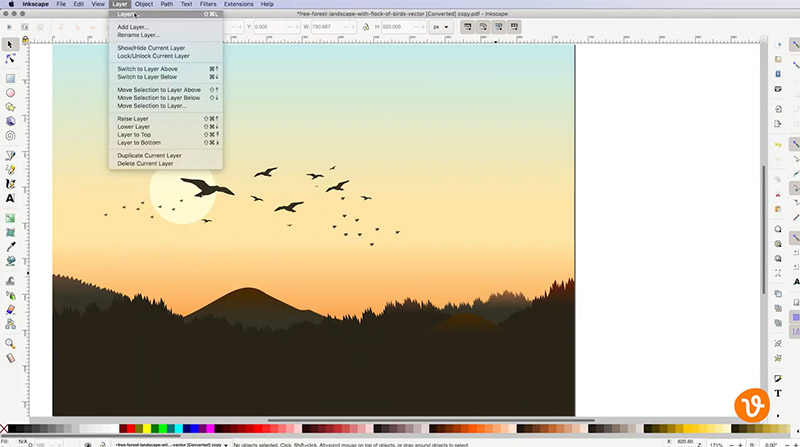
Then look in the Layers panel for any layers that are locked, designated by the lock icon. Click the icon to then unlock the layer.
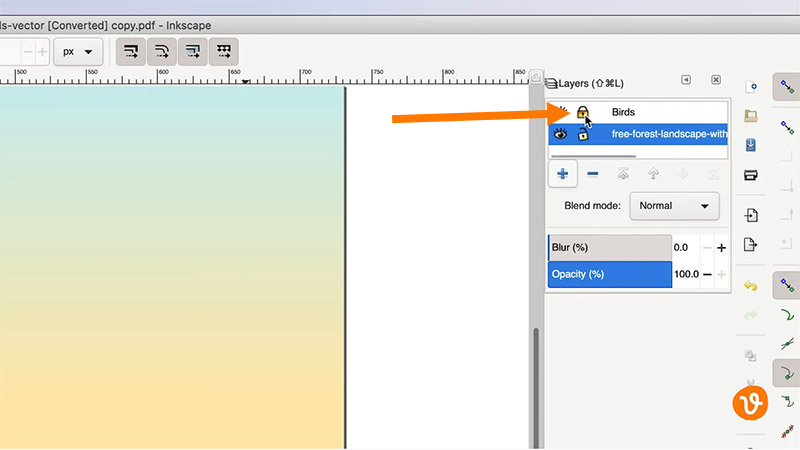
Now you can edit those layers and the elements within them.
Get millions of stock images and videos at the best price
Unlimited access. No attribution required. Starts at just $9/month.

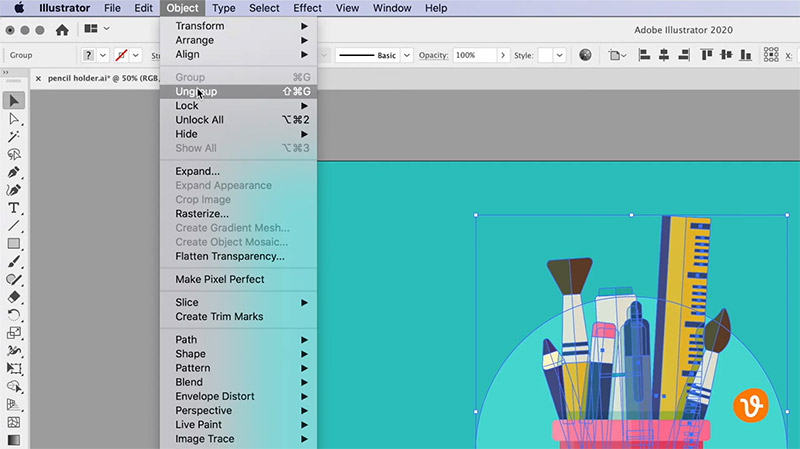
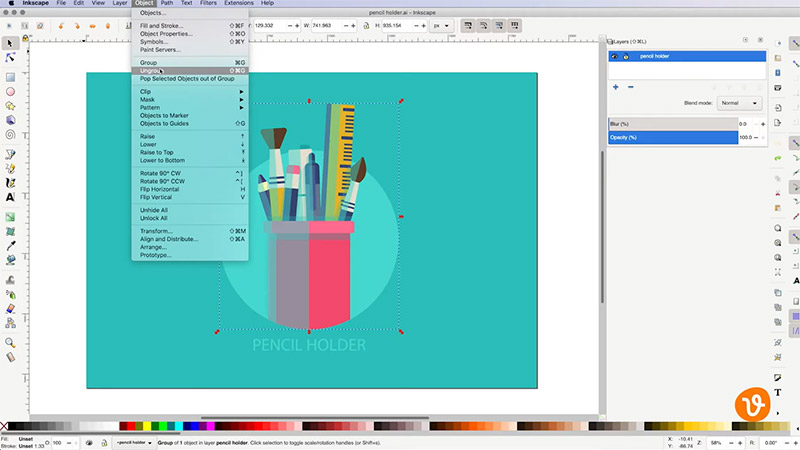
2. Ungrouping Objects
To keep objects together within a vector image, an author may group certain pieces together. This means if you attempt to move an item, for example, other items might move along with it.
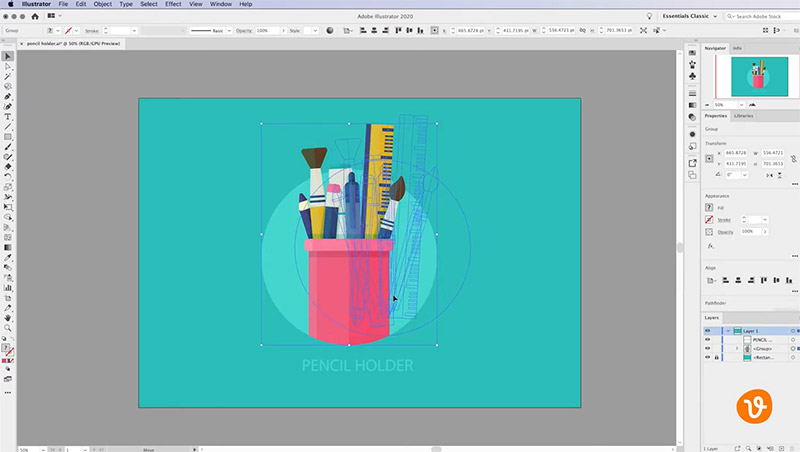
To ungroup elements in Illustrator, simply click on a grouped item, go to the Object menu and choose Ungroup.
In Inkscape, the process is exactly the same. Click on a grouped object and then go to the Object menu and select Ungroup. Now each object is on its own.
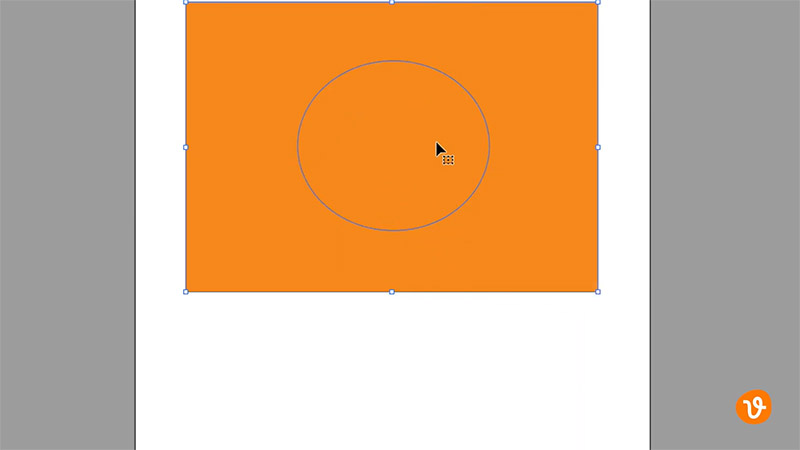
3. Releasing a Compound Path
Let’s say you have an object with a cutout or hole in it and you want to remove its gap.
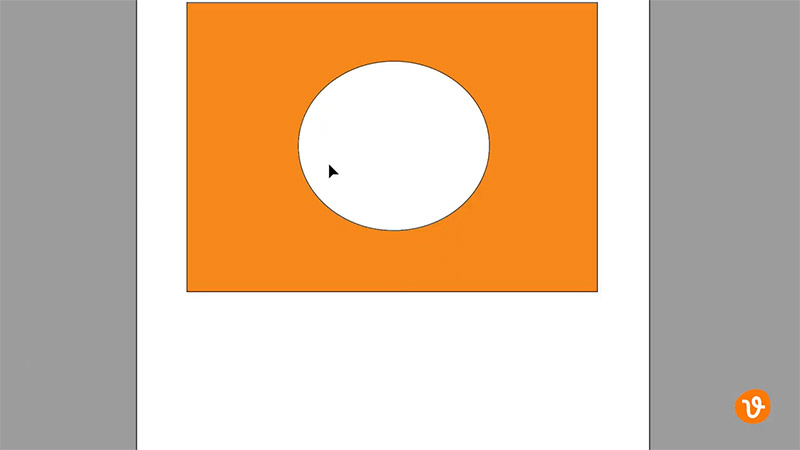
In Illustrator, simply click on the object and then right-click and choose Release Compound Path.
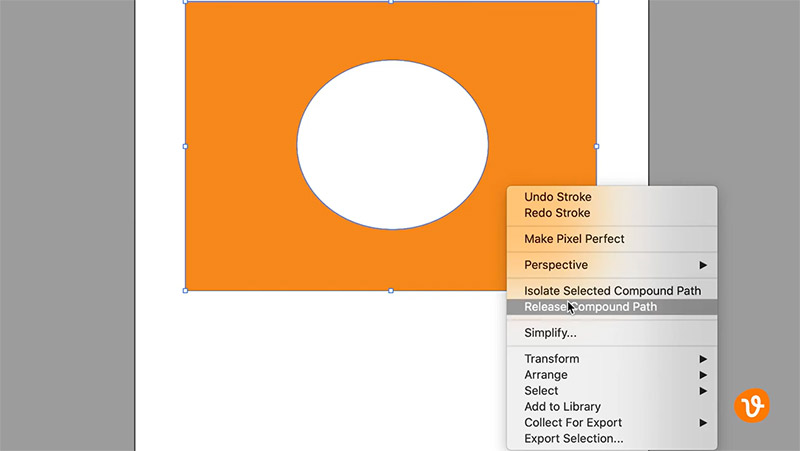
Illustrator will then fill the gap back into the original object.
In Inkscape, click the object and then go to the Path menu and choose Break Apart.
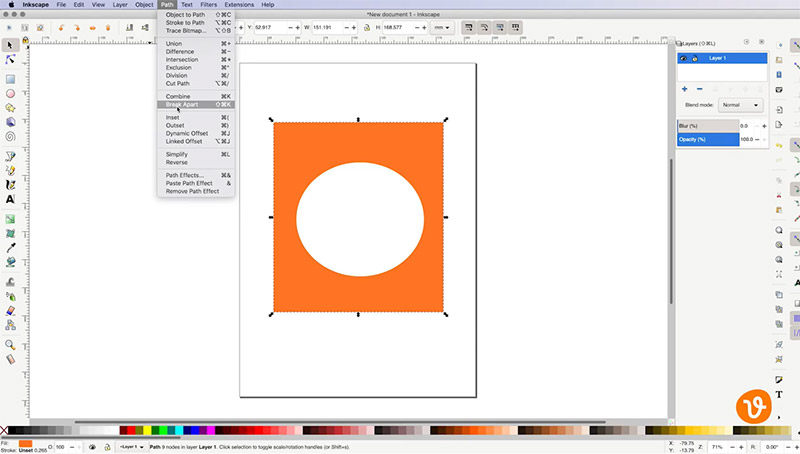
Now you can easily remove gaps within objects.
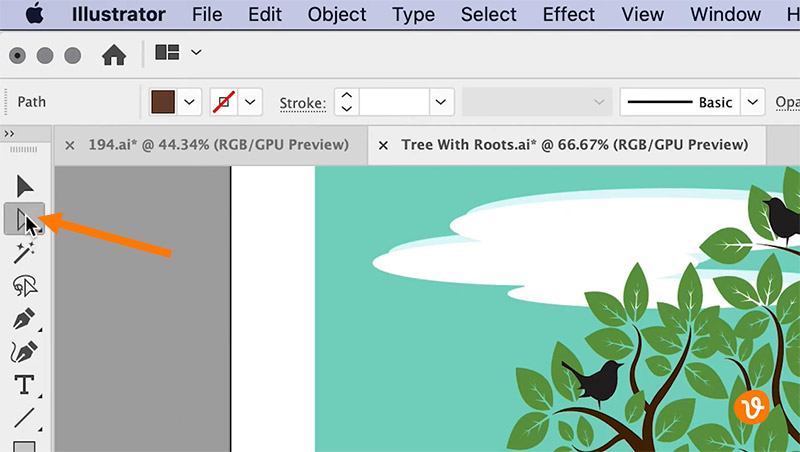
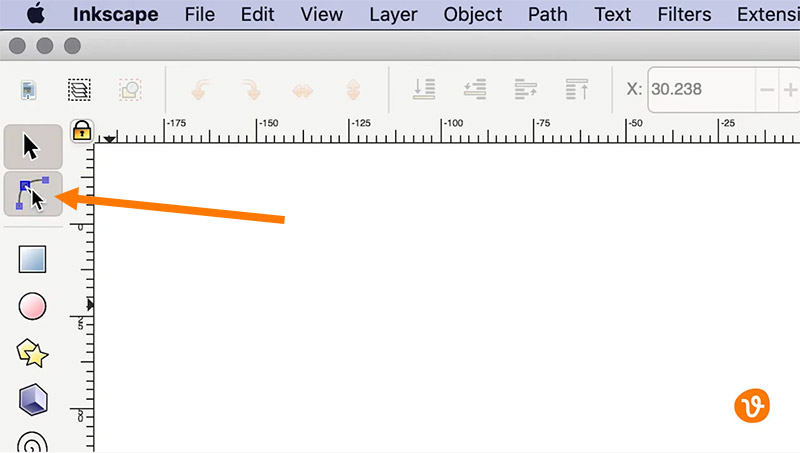
4. Using the Direct Selection Tool or Node Tool
The Selection tool (black arrow icon) allows you to choose objects in groups.
The Direct Selection tool (white arrow icon in Illustrator) and the Node tool in Inkscape allow you to select individual anchor points or path segments by clicking on them.

In Illustrator, select an object by using the Selection tool and then switch to the Direct Selection tool to modify a point within the object.
In Inkscape, use the Selection tool to select an object, and then use the Node tool to modify a point within the object.
Now you can change the path or shape of an object by manipulating its points.
Related: Raster vs. Vector
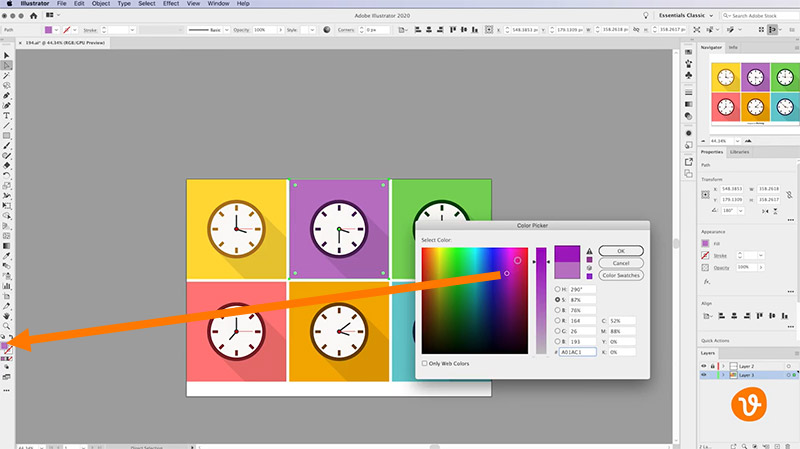
5. Changing the Color of Objects
One of the most common tasks in manipulating a vector image will be changing its elements’ colors. To do this in Illustrator, simply click on an object or element, then determine if you’re looking to change its fill color or its stroke color. Double click on either the fill color or the stroke color to open the color picker and select a new color.
In Inkscape, click on an object and then go to Object and select Fill and Stroke from the menu.
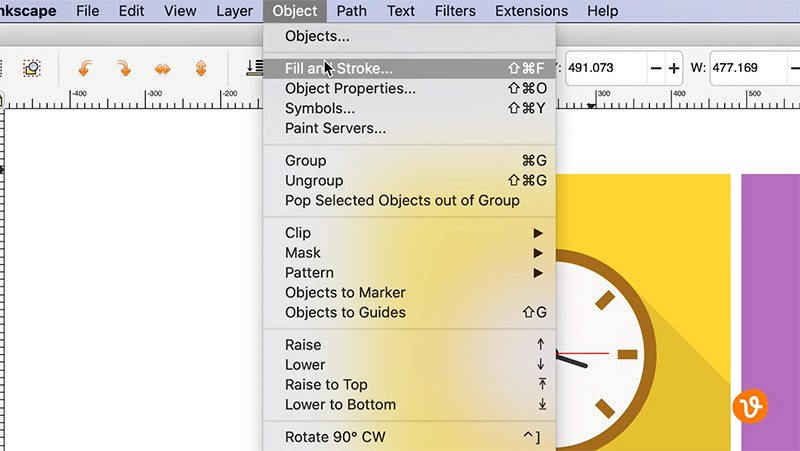
Then use the Color panel to choose a new color.
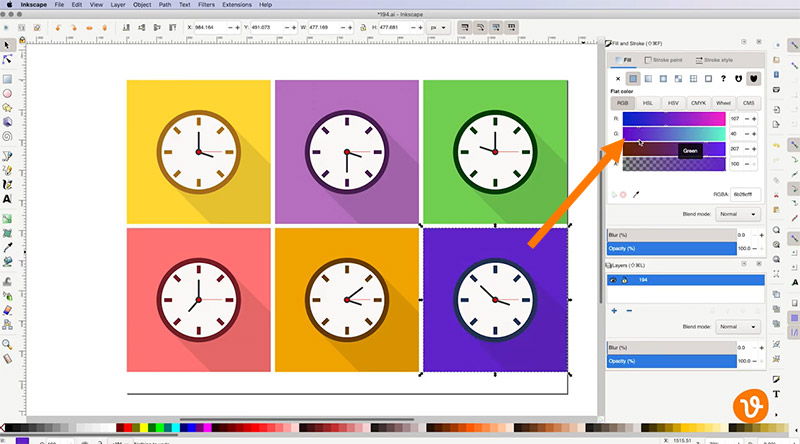
Now you can easily change an element’s color.
With the help of these tips, you’ll be able to easily edit and modify the vectors you download from Vecteezy.
For more tips, please see:
- Exporting Vector Graphics from Illustrator or Inkscape
- How to Export Images from Inkscape to PowerPoint
- Raster vs. Vector: Understanding Design File Types
Lead image by swayaway1.