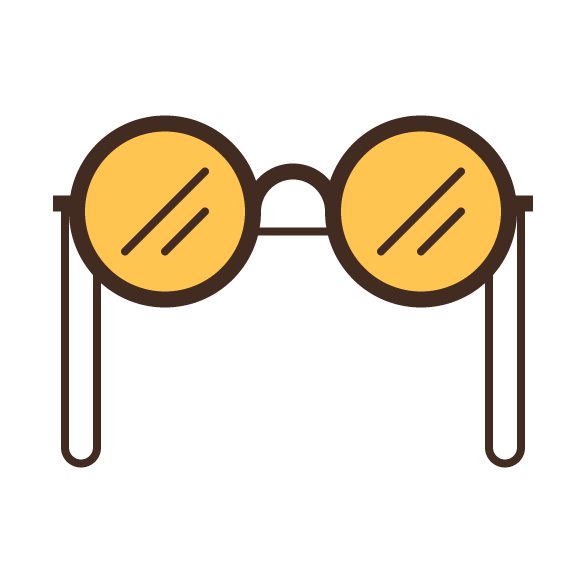
Welcome back to another Illustrator tutorial! Today we’re going to make a hipster glasses vector, which you can use for music festival posters, John Lennon designs, and other free-spirited illustrations. The best part? We’re going to make this vector using nothing more than the basic tools you probably work with every day.
So, grab a cup of coffee and let’s design some sunnies!
Tutorial Details: Hipster Glasses Icon
- Program: Adobe Illustrator CS6 – CC 2016
- Difficulty: Beginner
- Topics Covered: Design Theory, Compositional Construction, Shape Alignment, Grid Positioning
- Estimated Completion Time: 30 Minutes
Final Image: Hipster Glasses Icon

Step 1
As with every new project, start by first setting up a New Document by going over to File > New (or using the Control-N keyboard shortcut), which we will adjust as follows:
- Number of Artboards: 1
- Width: 128 px
- Height: 128 px
- Units: Pixels
And from the Advanced tab:
- Color Mode: RGB
- Raster Effects: Screen (72ppi)
- Preview Mode: Default
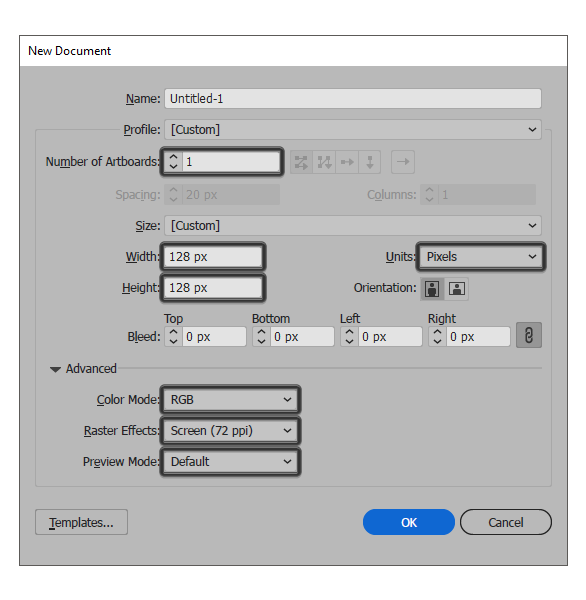
Quick tip: most of the indicated settings can be automatically triggered if you set the document’s Profile to Web, the only one that you’ll have to manually adjust being the Artboards Size (Width x Height).
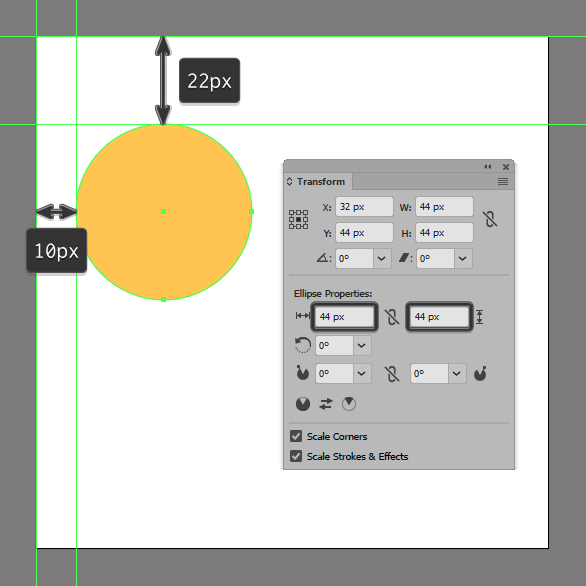
Step 2
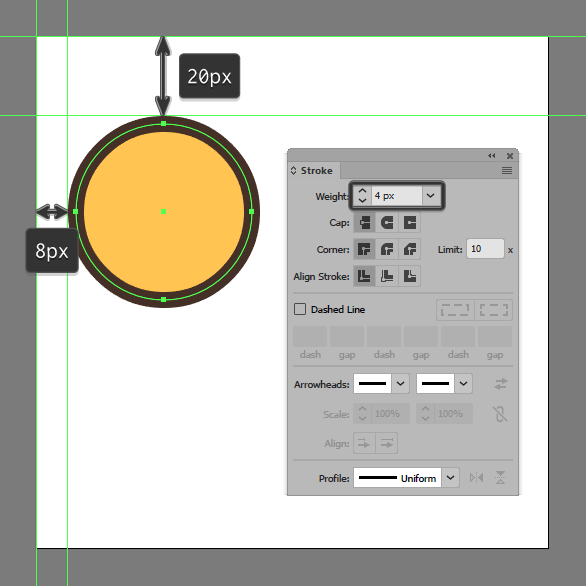
Once we’ve set up our project file, we can start working on the actual icon, by creating the main shape for the glasses’ left lens using a 44 x 44 px circle, which we will color using #FFC550, and then position at a distance of 10 px from the Artboard’s left edge, and 22 px from its top one.
Step 3
Give the shape an outline using the Stroke method, by creating a copy of it (Control-C) which we will paste in front (Control-F) and then adjust by first changing its color to #422C21 and then flipping its Fill with its Stroke (Shift-X), setting its Weight to 4 px. Once you’re done, select and group both shapes together using the Control-G keyboard shortcut.
Get millions of stock images and videos at the best price
Unlimited access. No attribution required. Starts at just $9/month.
Step 4
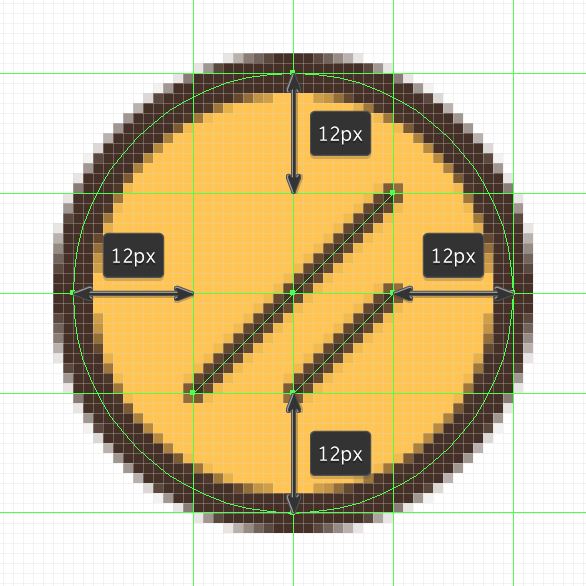
Draw the diagonal detail lines using a two 2 px thick Strokes (#422C21), making sure to group and then center align them to the underlying circles afterwards. Once you’re done, select the lines and the lens and group (Control-G) those as well.
Quick tip: for this step I highly recommend you turn on the Pixel Preview mode (Alt-Control-Y) so that you can have full control over the positioning of your anchor points.
Step 5
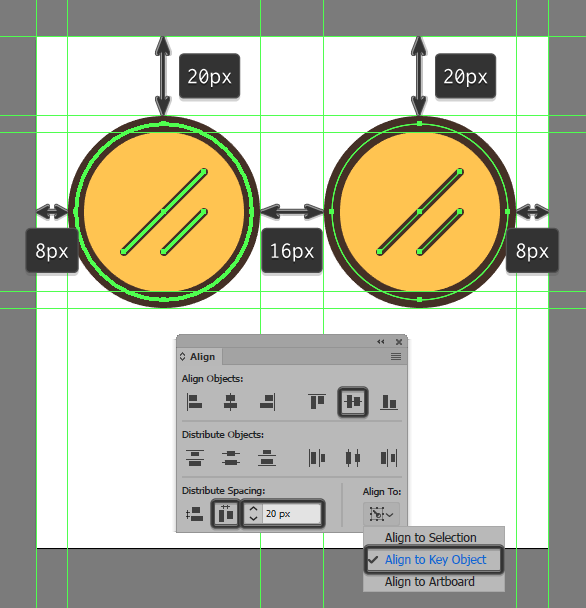
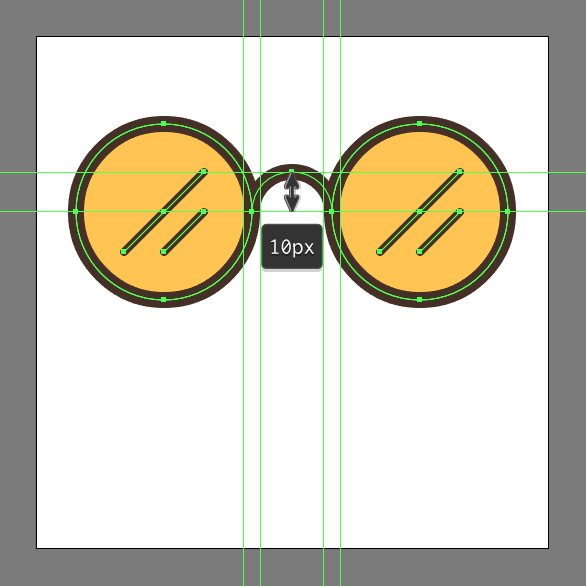
Create the right lens using a copy of the one that we already have (Control-C > Control-F), which we will position onto the opposite side of the Artboard, maintaining the same 8 px distance from its right edge.
Step 6
Create the bridge holding both lenses together using a 20 x 20 px circle with a 4 px thick Stroke (#422C21), which we will center align to the empty space found between the two larger sections.
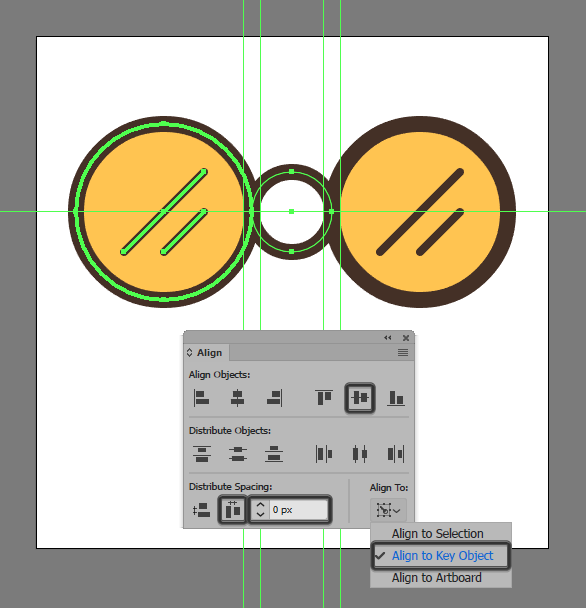
Step 7
Adjust the bridge’s shape by removing its lower half, by selecting its bottom Anchor Point using the Direct Selection Tool (A) and then removing it by pressing Delete. Once you’re done, select the resulting shape and the two lenses and group them together using the Control-G keyboard shortcut.
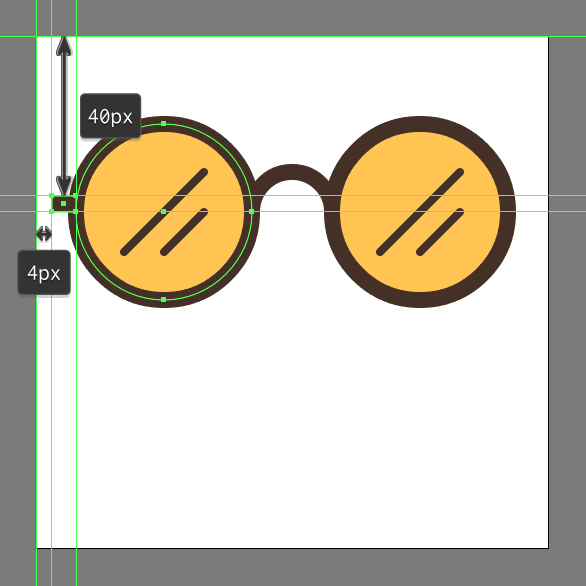
Step 8
Start working on the glasses’ left end piece, by creating a 6 x 4 px rectangle (#422C21) which we will position over the first lens’s outline, at a distance of 4 px from the Artboard’s left edge, and 40 px from its top one.
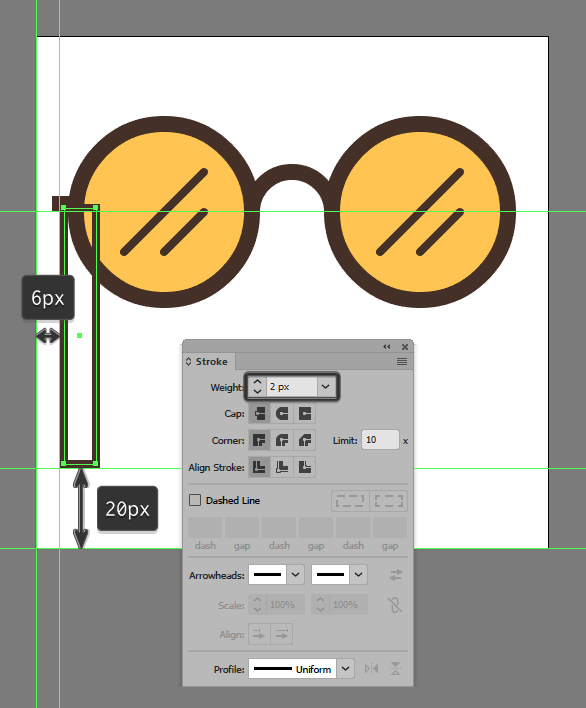
Step 9
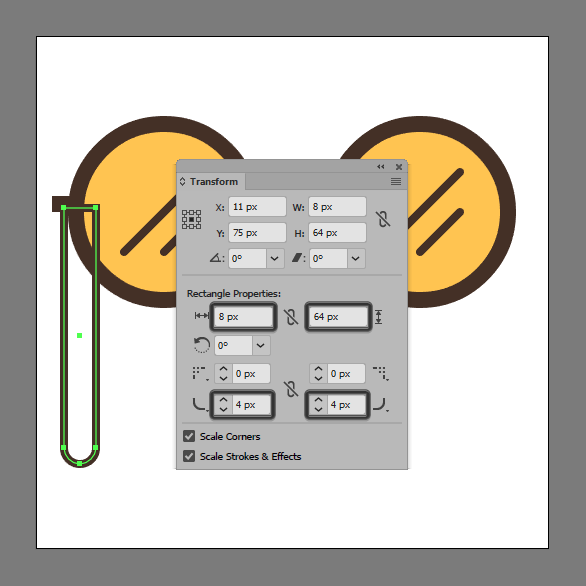
Add the little string section using an 8 x 64 px rectangle with a 2 px thick Stroke (#422C21), which we will position towards the center of the previously created shape.
Step 10
Adjust the shape of the string, by setting the Radius of its bottom corners to 4 px from within the Transform panel’s Rectangle Properties, selecting and grouping it to the smaller rectangle.
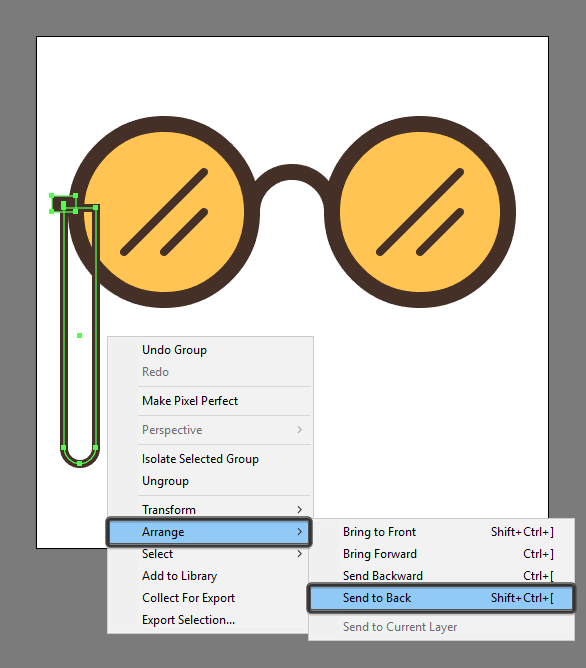
Step 11
Position the two shapes that we’ve just grouped underneath the larger lens, by right clicking > Arrange > Send to Back.
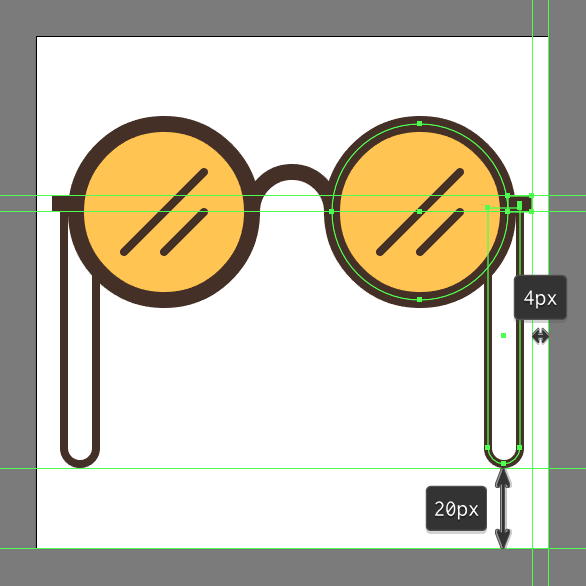
Step 12
Create the right string section, using a copy (Control-C > Control-F) of the one that we’ve just finished working on, which we will vertically reflect (right click > Transform > Reflect > Vertical) and then position onto the opposite side of the glasses.
Step 13
Finish off the glasses and with them the icon itself by adding the center section of the string using a 20 x 2 px rectangle (#422C21) which we will center align to the bridge, positioning it bellow at a distance of 12 px from its upper section. Once you’re done, select and group all of the icon’s composing shapes together using the Control-G keyboard shortcut.

Great Job!
Assuming you’ve managed to follow each and every step, you should now have a cool looking pair of hipster glasses ready to be used in any future personal project.